Purpose
This guide explains how to configure a Ruckus Wireless device in standalone mode for use with Cloud4Wi. Please note that the images in this article may display outdated configuration data. Always refer to the 'Parameters for the Solution' section at the bottom of the page for the most up-to-date information.
Prerequisites
This guide is intended for firmware version 9.4 or later. If you are using an older version, please upgrade your firmware before proceeding. To use a Ruckus Wireless device as an access point, the router must have an active Internet connection. All standalone Ruckus Wireless devices are currently supported.
Accessing the access point
The default IP address of the device is 192.168.0.1. For initial access, we recommend connecting the device to a PC configured with a static IP address on the same subnet (e.g., IP: 192.168.0.2; Netmask: 255.255.255.0).
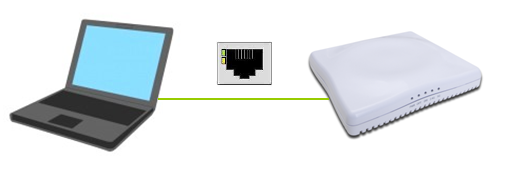
To access the device, type the following URL into your browser: https://192.168.0.1.
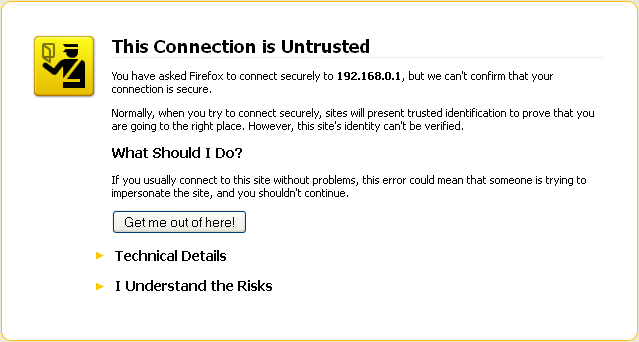
A security alert will be displayed. You can securely go ahead.
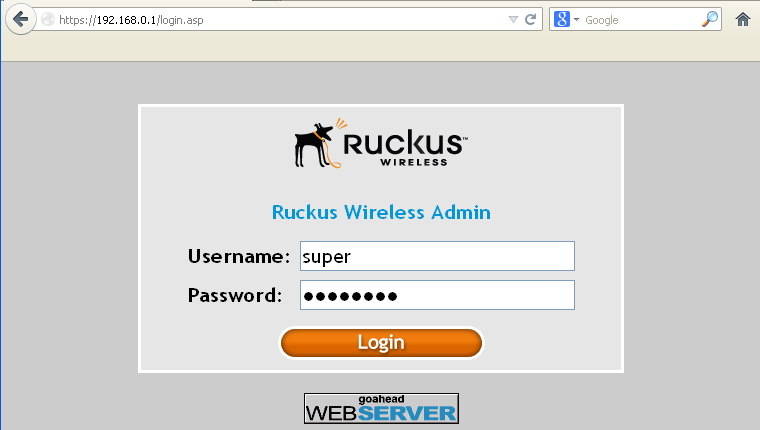
After, you will be asked for username and password. The default credentials are:
Username: super
Password: sp-admin
Check firmware version
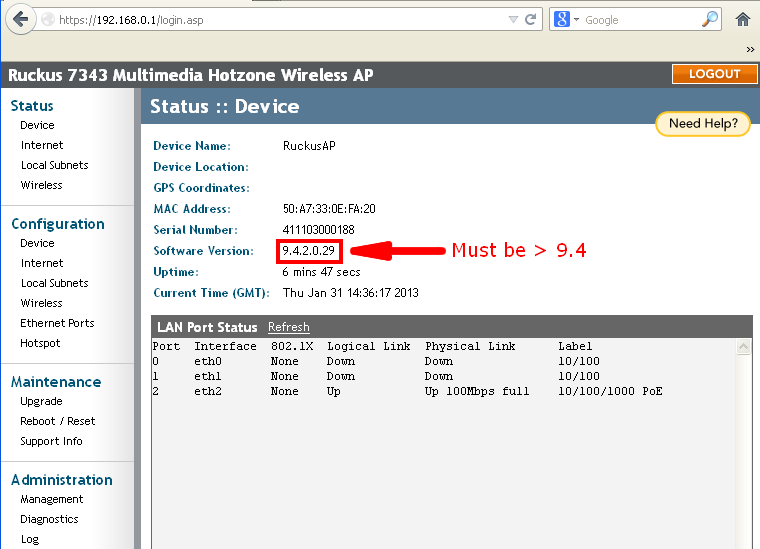
Once logged in, you will be automatically redirected to the Status :: Device section. From here, you can verify the installed firmware version. If the version is earlier than 9.4, you must perform an upgrade, as several features described in this guide are not available in older versions.
Configuring general settings
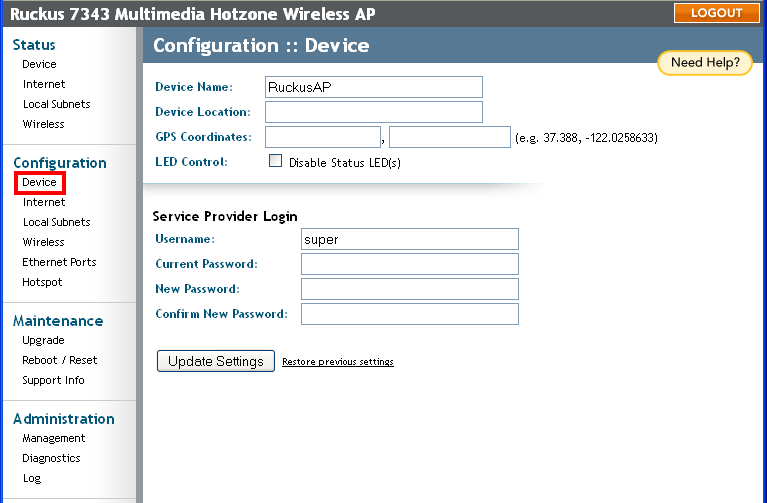
General device settings, such as the device name and Web UI access credentials, can be managed in the Configuration :: Device section. Ensure you click the Update Settings button to save any changes.
Configuring local subnets
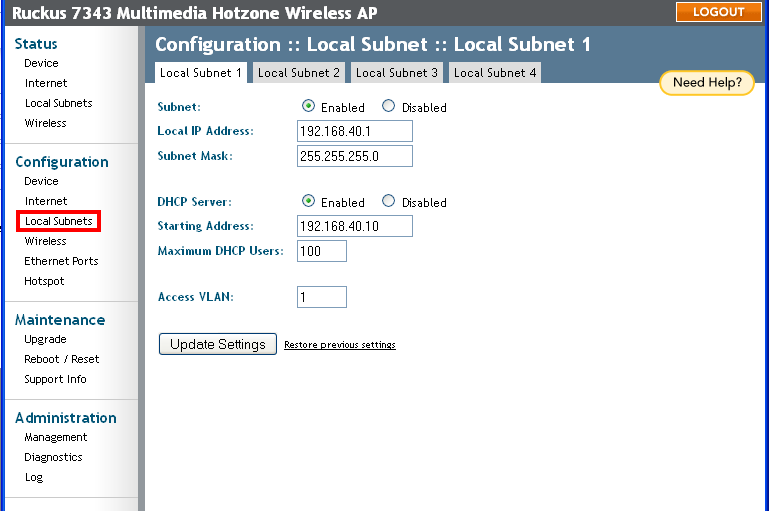
In the Configuration :: Local Subnets section, you can configure the access point's network settings and IP assignment policies, such as enabling or disabling the DHCP server and defining the IP range for clients. You must click the Update Settings button to save your changes.
Configuring the access point
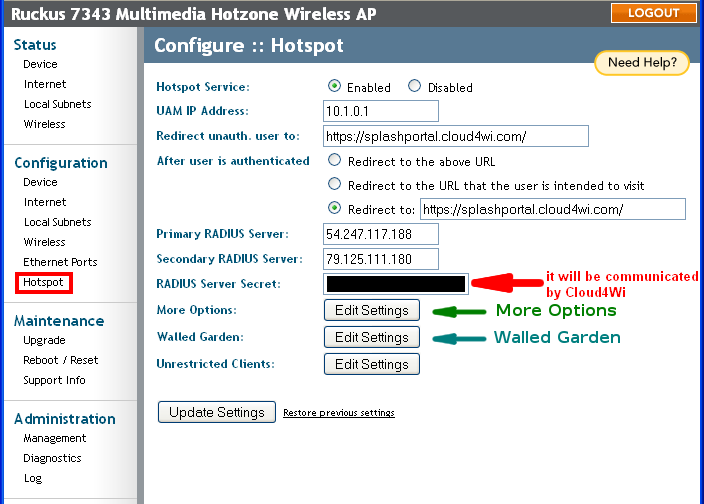
The Configuration :: Hotspot section allows you to configure essential parameters for the access point, such as the Splash Page URL, RADIUS server IP address, authentication data, and the Walled Garden (allowed websites). The two Edit Settings buttons indicated by the arrows are critical for this configuration. Ensure you click the Update Settings button to save your data.
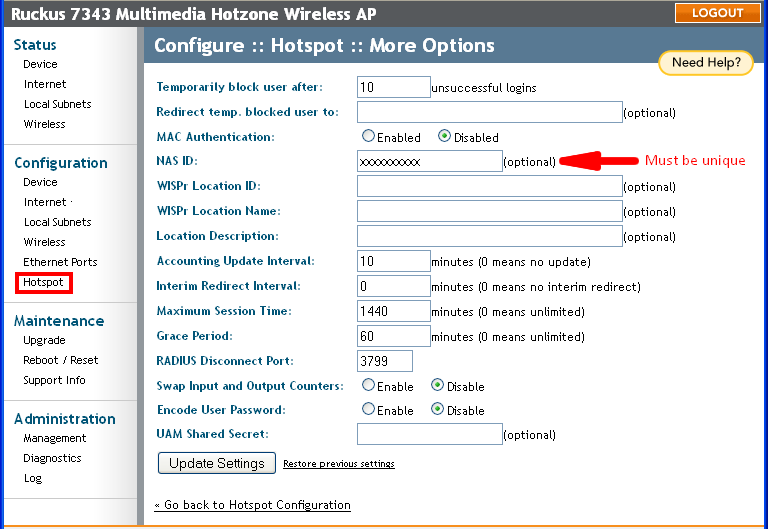
Clicking the Edit Settings button under More Options allows you to define specific attributes to be sent to the RADIUS server. For the solution to function correctly, the NAS ID must not be empty and must be unique for every device within the network. You must click the Update Settings button to save your changes.
Clicking the Edit Settings button for the Walled Garden allows you to define the list of websites accessible to unauthenticated users. You must click the Update button to save your changes.
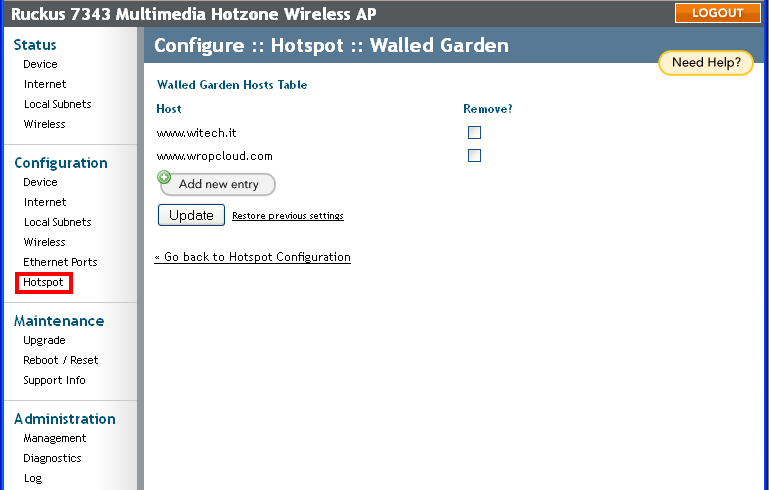
In order to configure the walled garden, please check the following articles:
- Walled garden for the Social Login (websites/domains to open)
- Walled garden for PayPal feature (websites/domains to open)
Configuring the wireless network
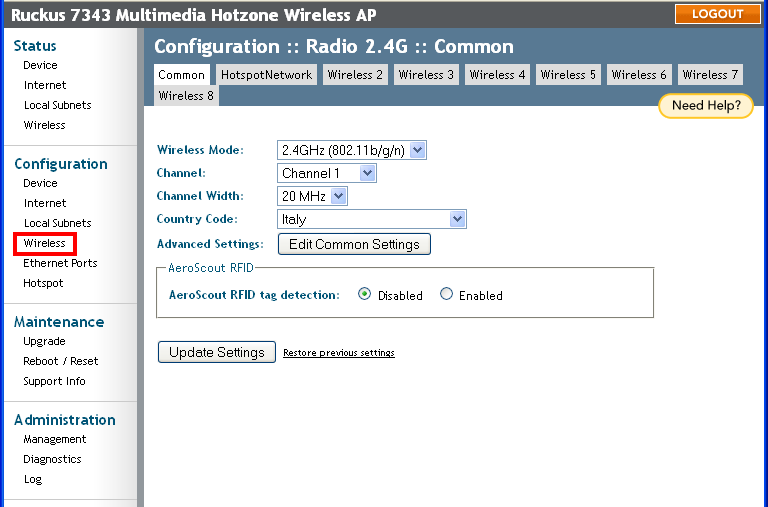
In the Configuration :: Wireless section, you can configure your wireless networks. The first tab allows you to manage common settings shared across all networks on the device. You must click the Update Settings button to save your changes.
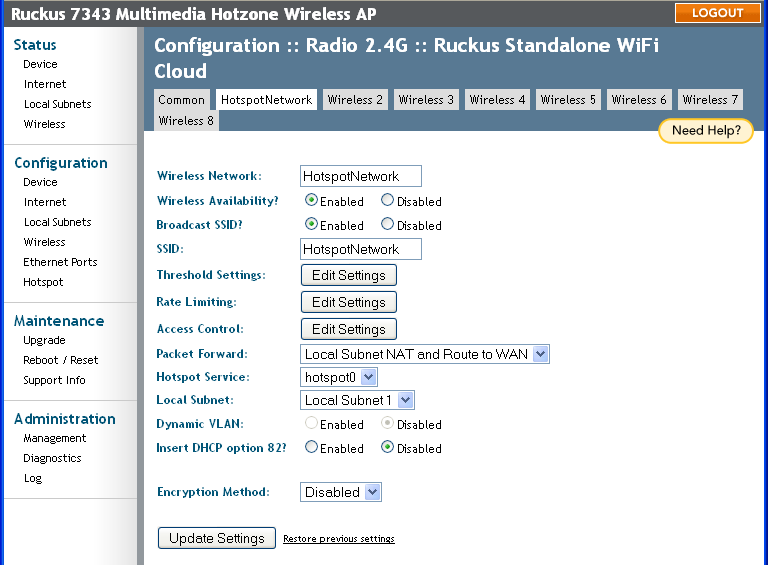
The remaining tabs in the Configuration :: Wireless section allow you to manage individual networks, each corresponding to a specific SSID. The example below shows a network named 'HotSpotNetwork', configured as an access point network using a Splash Page for authentication. Both the Local Subnet and the Hotspot Service should be set to the ones configured previously. You must click the Update Settings button to save your changes.
Firmware upgrade
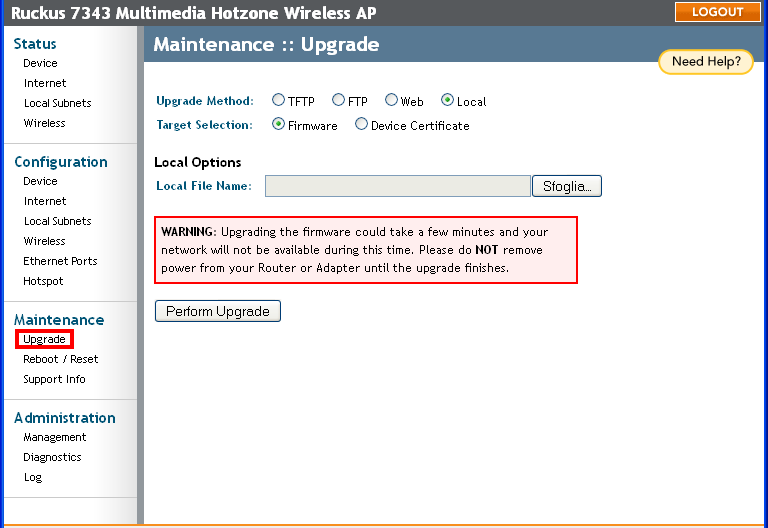
By accessing the Maintenance :: Upgrade section, you can upgrade the device firmware version by using 4 methods (TFTP, FTP, Web, Local).
Allowing free access to the CDN
Explained in the article Enabling the CDN, you must add some IP addresses to the walled garden in order to support the access to the CDN.
The IP addresses to add for this purpose are:
- 50.18.178.180
- 54.248.102.194
- 54.246.86.254
- 46.137.206.166
- 54.232.119.5
- 54.253.118.101
Entering the device details into the Cloud4Wi Dashboard
In order to use the device in the Solution, you must enter its details into the Cloud4Wi Dashboard.
To get further information on how to do that, please see How to add an access point. Anyway, in the Cloud4Wi Dashboard, a field called Identifier will be required by the web interface. For Ruckus Wireless Standalone products, as said before, it corresponds to the NAS ID value that has been configured in Hotspot > More Options settings.
It is mandatory that this value it is unique for all the devices within the network. Otherwise, the devices will be not correctly integrated with the Solution.
Parameters for the Solution
The parameters to use to integrate the device with the Solution are described in the following document:
Intro to WiFi network configuration
Please note that it is necessary to enter the Splash Page URL exactly as it is written above.
If you enter the Splash Page URL in different formats (e.g. https://splashportal.cloud4wi.com/c4wportal/mysplashportal), then the redirection will fail and the end-user will not be able to see the Splash Page.
If these parameters change in the future, we will promptly inform you about new values.