Purpose
This guide describes how to configure a Ruckus Wireless device using the Controller-AP architecture for Cloud4Wi.
Please note that while the screenshots in this guide are for illustrative purposes, they may contain outdated configuration values. Always refer to the 'Parameters for the Solution' section at the bottom of this page for the most accurate and up-to-date data.
Prerequisites
This guide applies to the Solution for the version 4.2.1.3 or later.
The following device models are supported:
- ZD1000
- ZD3000
- ZD5000
To use a Ruckus Wireless system, both the controller and the access points must have a stable internet connection. Additionally, ensure that the access points are correctly provisioned to point to the controller.
To guarantee an optimal user experience and avoid security warnings, you must upload a trusted SSL certificate to the controller.
Accessing the controller
You can access the controller through the web UI.
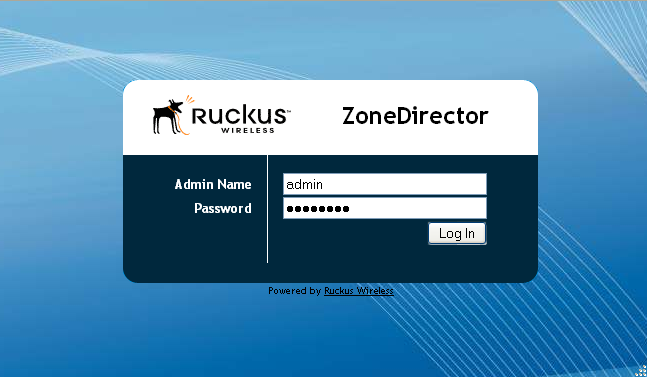
The controller must be configured to communicate correctly with both the RADIUS server and the Splash Page, with the access point setup being the final step of the process.
The procedure involves first configuring the RADIUS server settings, followed by the Hotspot Service, and finally the WLAN and its associated WLAN Group. Once these steps are complete, the WLAN Group must be assigned to the specific access points intended for the service. Each of these steps will be discussed in detail below.
RADIUS server configuration
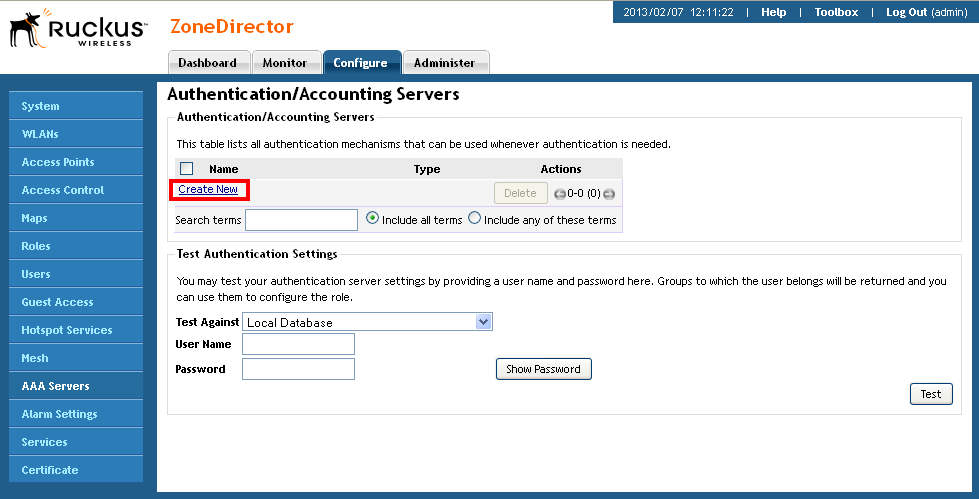
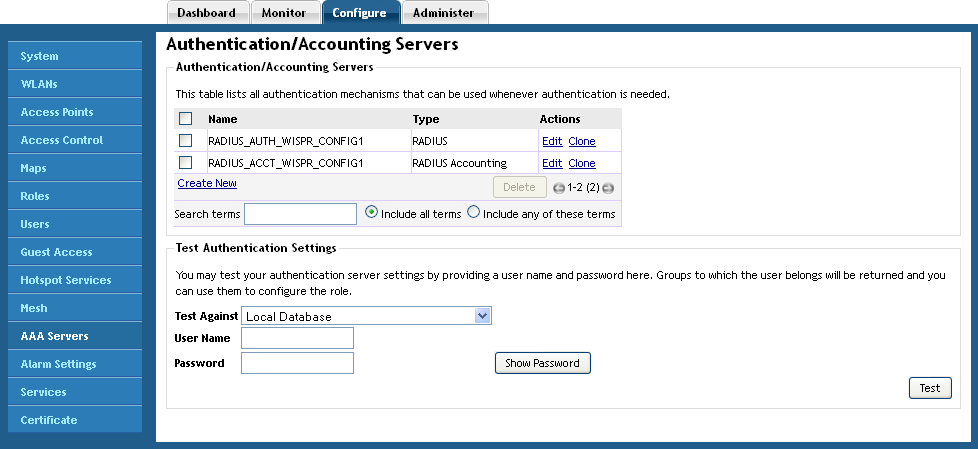
In the Configure > AAA Servers section, you can view all existing RADIUS servers or create a new one for authentication or accounting. To proceed with the setup, click Create New.
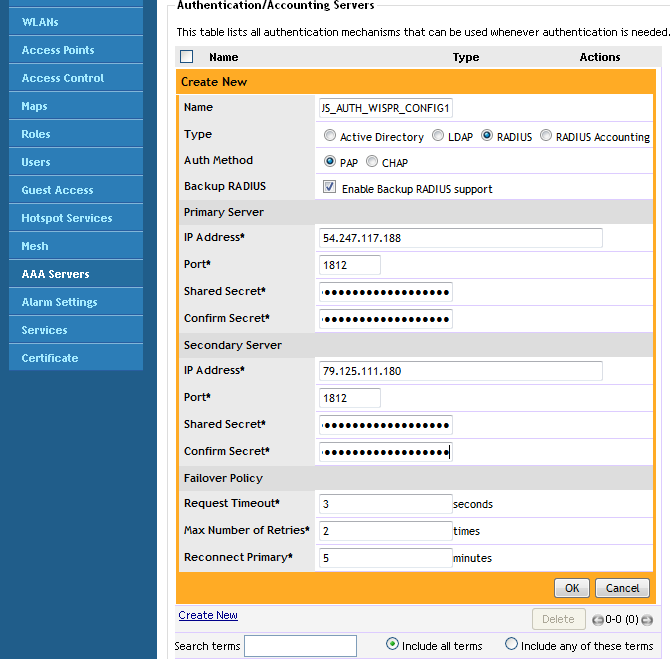
Each RADIUS server must be assigned a unique name. Set the Type to RADIUS for the authentication phase, or RADIUS Accounting for the accounting phase.
The first step is to configure the primary RADIUS server for authentication (Type = "RADIUS"). You may also configure a secondary RADIUS server for redundancy
Then it is required to create the RADIUS server for the accounting phase (Type = "RADIUS Accounting"). It's also possible to set a secondary RADIUS server.
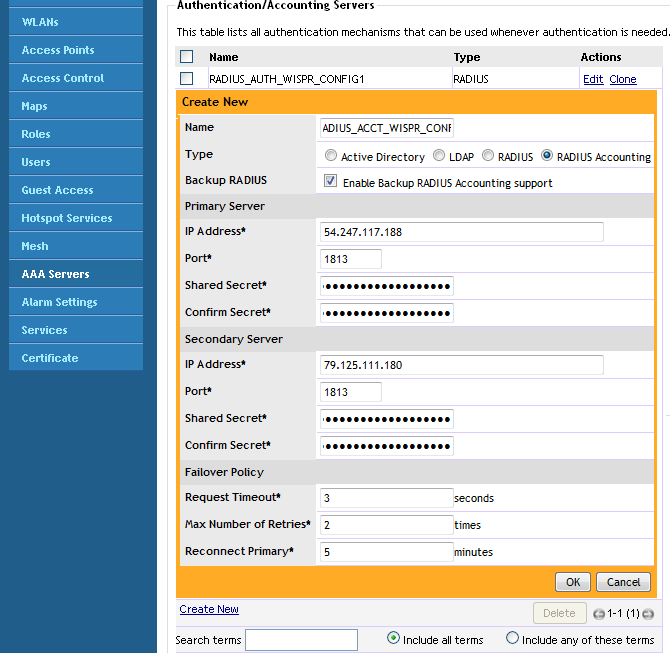
The two entries will be displayed.
Hotspot Service configuration
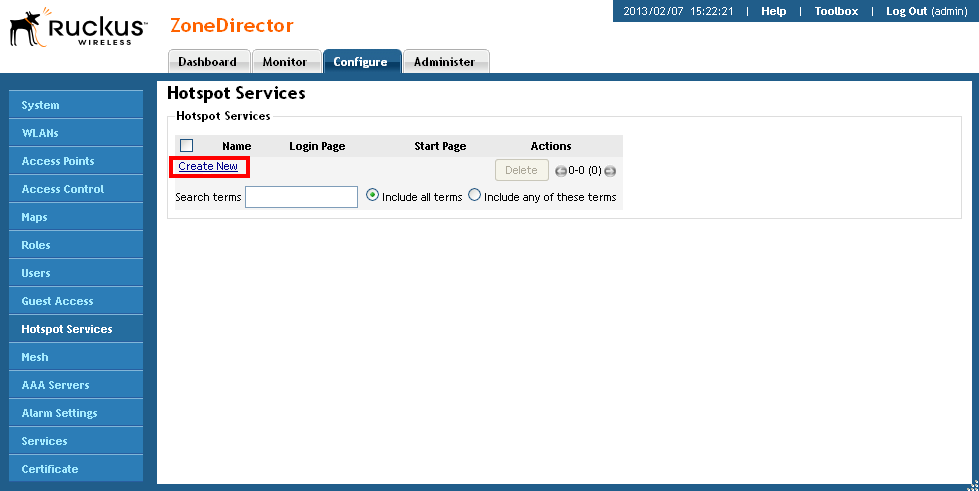
Through the Hotspot Service section in the Configure tab, it is possible to view all Hotspot Services entries. It is possible to add a new one by clicking the Create New link.
Here, you must enter the Splash Page URL and select the RADIUS server configured previously. You can find the correct Splash Page URL in the 'Parameters for the Solution' section at the bottom of this page.
If no valid SSL certificates have been uploaded to the controller, users may experience issues during authentication or when requesting a logout on certain devices.
For firmware version 9.3 or higher, this can be resolved by appending the query parameter ?protocol=http& to the Login Page URL. This ensures that authentication and logout requests are handled via HTTP instead of HTTPS. This configuration is optional; it is up to the administrator to decide how to manage security protocols.
If the Splash Page URL is:
https://splashportal.cloud4wi.com/
it is possible to handle authentication and logout requests by using HTTP protocol by setting as Login Page the following URL:
https://splashportal.cloud4wi.com/?protocol=http&
Additionally, you can define a Walled Garden (a list of websites) that unauthenticated users can access before logging in. To configure this, add the required IP addresses or hostnames to the Walled Garden section.
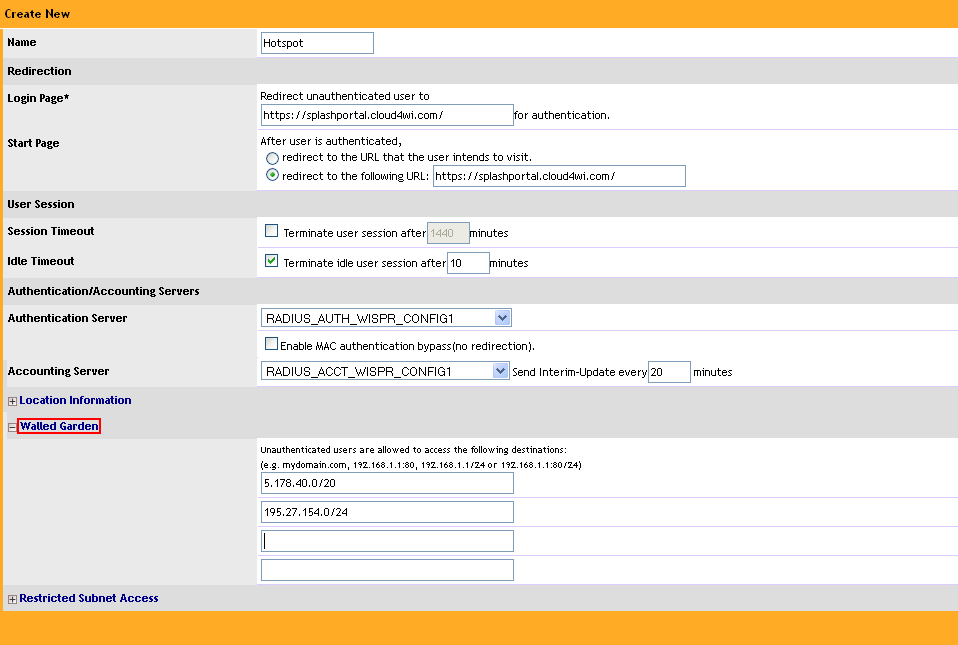
In order to configure the walled garden, please check the following articles:
- Walled garden for the Social Login (websites/domains to open)
- Walled garden for PayPal feature (websites/domains to open)
Please note that firmware version 9.8 or later supports wildcard domains in the Walled Garden, making configuration significantly easier. If you need to configure a Walled Garden, we strongly recommend updating to version 9.8 or higher.
WLAN configuration
The Hotspot Service created in the previous steps incorporates your Splash Page and RADIUS settings. You must now assign this service to a WLAN.
In the Configure > WLANs section, you can view all existing networks. Click the Create New link in the WLANs subsection to set up a new network.
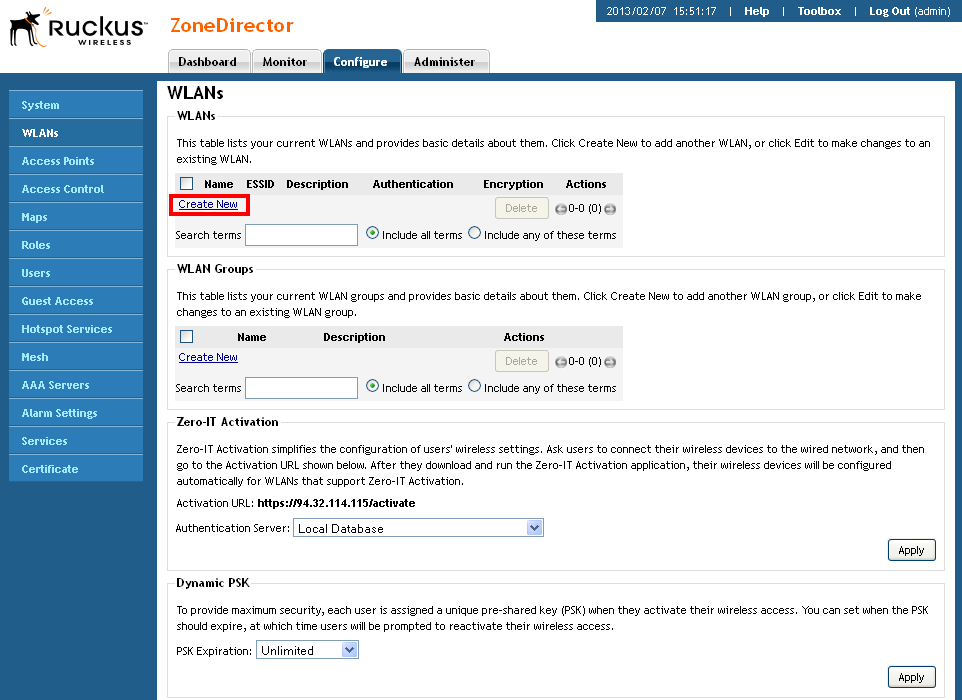
You must specify both a Name and an ESSID for the WLAN. Ensure that no encryption is selected, as end-user authentication is handled via the RADIUS server. Finally, under Hotspot Services, select the service created in the previous steps (e.g., 'Hotspot').
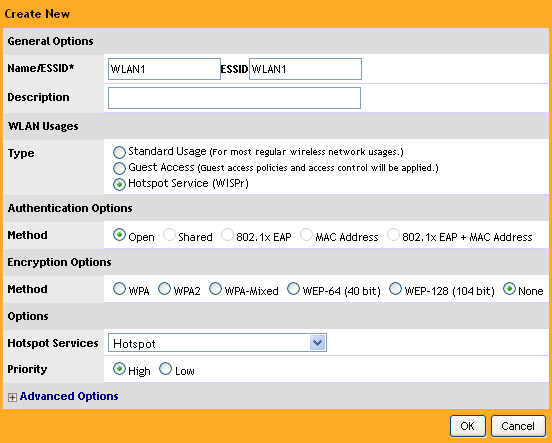
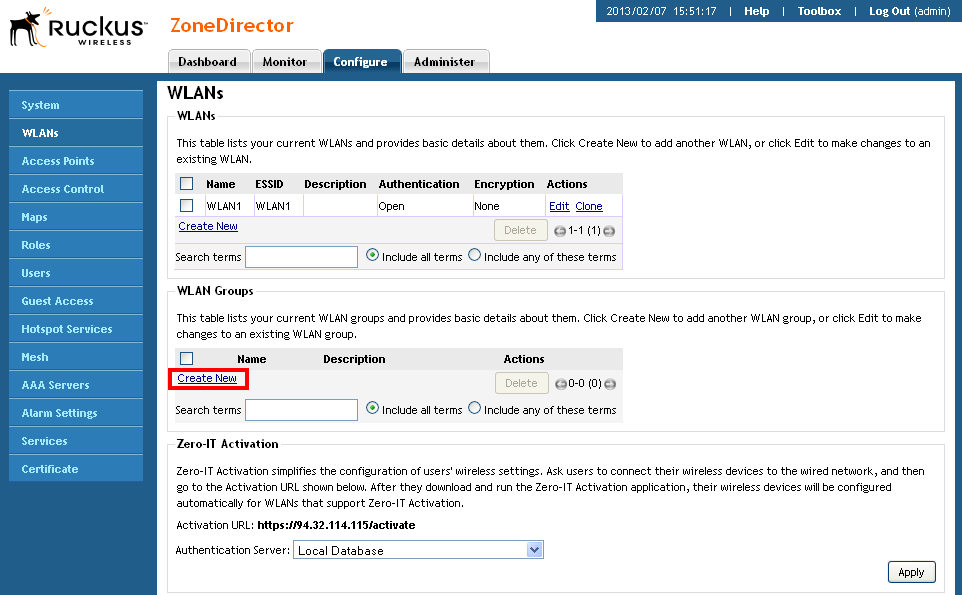
As the last step for this section, it is required to create a new WLAN Group. To do this, click the Create New link in the WLAN Groups sub-section.
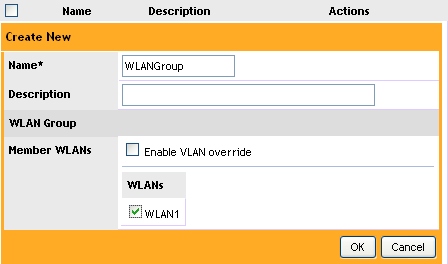
A WLAN Group can include one or more WLANs. In this case, it is just necessary to include the WLAN just created (that we called "WLAN1").
The controller configuration is now complete. The next step is to apply these settings to one or more access points managed by the controller. In the Monitor > Access Points section, you can view all devices currently connected. To apply the configuration to a specific device, select it and click the Configure button under the Actions menu.

In the page opened it is necessary to apply the WLAN Group previously created.
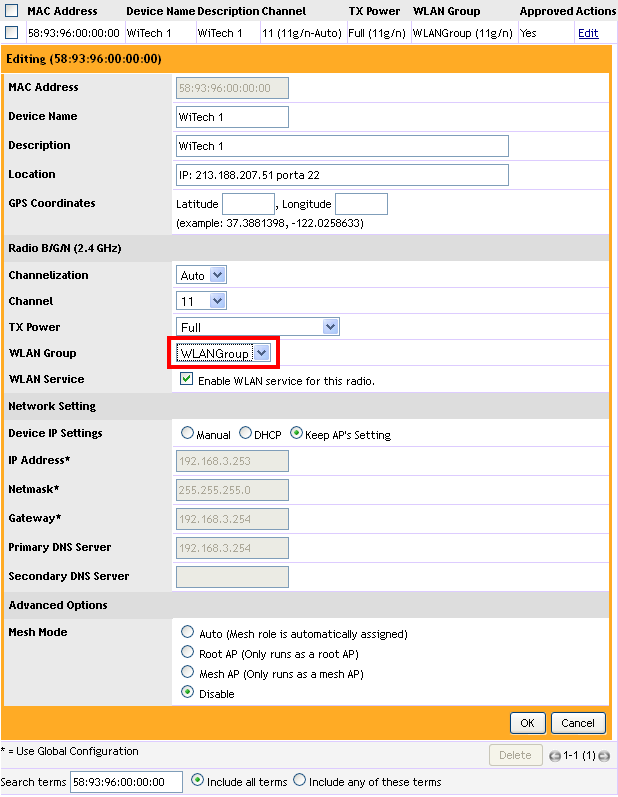
The configuration is now complete.
Entering the device details into the Admin Panel
In order to integrate the device with the Solution, it is necessary to enter its details into the Admin Panel.
In this case you need only the MAC address, and you can find it in the bottom part of the device, as shown in the next picture. You can enter this string uppercase or lowercase, it does not make any difference.
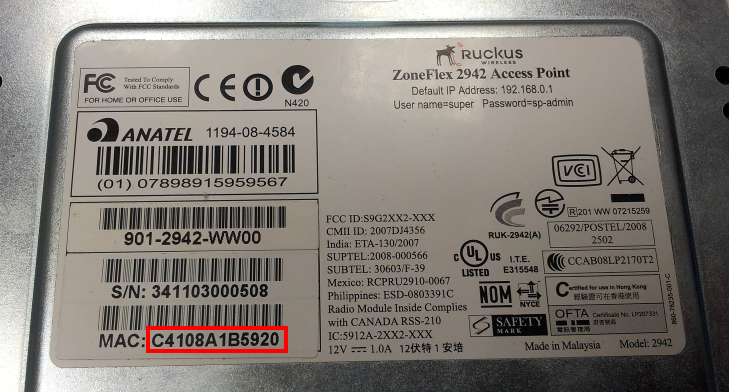
It's possible to retrieve the MAC address through the web interface by accessing the Access Points section in the Monitor tab. You can see the MAC address in the picture below. Please note that this string may be entered indifferently uppercase or lowercase and with no separators.
If the MAC address is C4:10:8A:1B:59:20 (see picture above), the Identifier will be: C4108A1B5920 .
If the MAC address is 58:93:96:00:00:00 (see picture below), the Identifier will be: 589396000000 .

Allowing free access to the CDN
As explained in the article Enabling the CDN, it is necessary to add some IP addresses to the walled garden to support the access to the CDN.
The IP addresses to add for this purpose are:
- 50.18.178.180
- 54.248.102.194
- 54.246.86.254
- 46.137.206.166
- 54.232.119.5
- 54.253.118.101
Parameters for the Solution
The parameters to use to integrate the device with the Solution are described in the following document:
Intro to WiFi network configuration
If you enter the Splash Page URL in different formats (e.g., https://splashportal.cloud4wi.com/c4wportal/mysplashportal), then the redirection will fail, and the end-user will not be able to see the Splash Page.